Maui 17.03 is now available as upgrade option for existing Maui 2.x users.
In order to upgrade there are some things necessary to setup. As Maui wants to provide a very stable desktop experience for our users this update is optional and will not roll in automatically on the default configuration of Maui 2.x.
If you want to perform this upgrade be advised to have backups of your existing system and personal data.
This step by step guide is based on lots of images and some description to provide the easiest possible way for users to upgrade their systems.
Of course it is possible to also use other methods like a terminal only way to upgrade your system. Be advised to take a look at the Steps marked as IMPORTANT and the Hints at the end of this step by step guide.
Step by Step Guide on how to upgrade
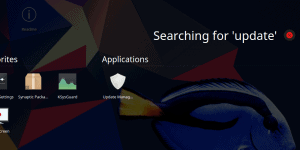
1. Start the Update Manager
2. Open Software Sources tool
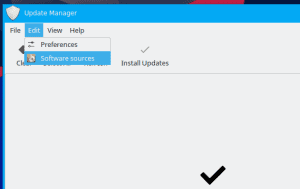
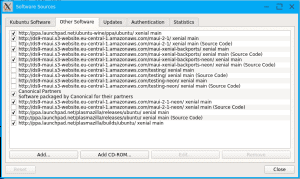
3. Activate the maui-xenial-backports and maui-xenial-backports-neon repositories / Or make sure they are activated
Cancel out if it asks to refresh the package lists.
4. Run the command in a terminal (IMPORTANT)
sudo rm -r /var/lib/apt/lists/* && sudo apt-get update
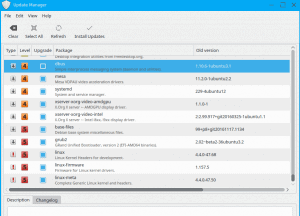
5. Hit refresh on the update manager
6. Make sure to mark Updates with priority 4 and up aswell
7. Hit Install and if it asks to remove some packages and add some new hit Ok
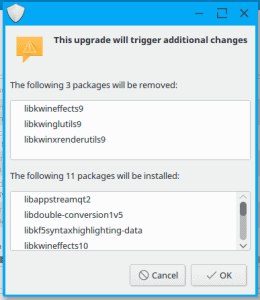
It will then start downloading and installing all the packages. This can take up to 30 minutes depending on your internet connection.
Troubleshooting:
If an error dialog appears such as  please hit no here and try hitting Install Updates again.
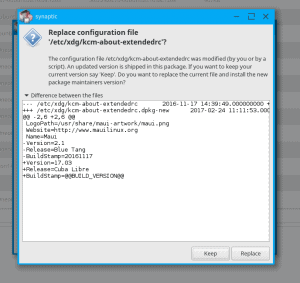
8. Overwrite /etc/xdg/kcm-about-extendedrc
The system will ask you to overwrite that file. Please choose Overwrite here which will change your “My Computer” and “About” information to Maui 17.03
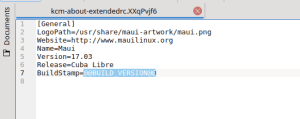
Notice: The @@BUILD_VERSION@@ string it will place in that file. If you want to put a proper date here you can manually edit that file and replace this string.
To do this execute the following in a terminal
EDITOR=kate sudoedit /etc/xdg/kcm-about-extendedrc
Save and close kate.
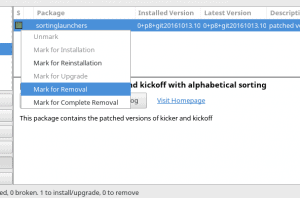
9. Remove old sortinglaunchers & reinstall Plasma-Desktop
After the update manager finishes please close it and open up synaptic packagemanager.
Here you have to remove the old sortinglaunchers package.
Hit Apply.
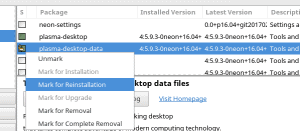
After the removal mark plasma-desktop and plasma-desktop-data for reinstallation.
This assures that the newest app dashboard launcher is installed and includes the Tab at the top to choose between Apps and Widgets.
10. Reboot
After going through all this steps it is time to reboot and enjoy Maui 17.03
Hints:
After reboot you might notice that the yakuake icon in the panel is a little bit weird. To fix it right click and go to properties
![]()
In properties you can click on the icon and change it to the yakuake one.
![]()
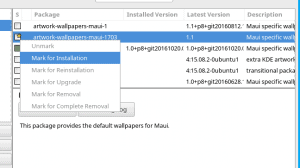
You can optionally install the new wallpapers Maui 17.03 provides by installing artwork-wallpapers-maui-1703
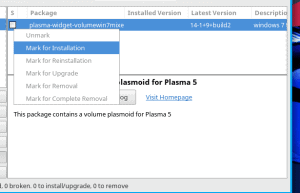
If you want to use the new volume widget in the panel you need to install plasma-widget-volumewin7mixer
You should be able then to just add the new widget by clicking on the bottom right of the panel (hamburger menu) and choosing Add widgets
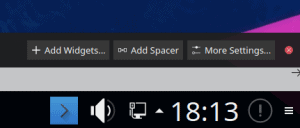
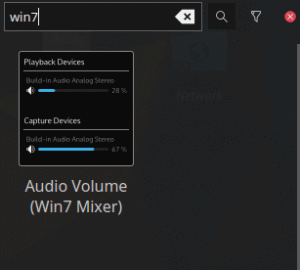
To remove the old widget click the bottom right of the panel (hamburger menu) hover over the old icon and remove it by pressing on the red X.
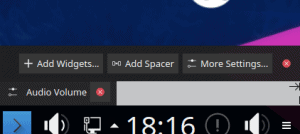
Feel free to move the new volumewin7mixer widget in panel editing mode (clicking on the bottom right hamburger menu and hovering over the icon clicking holding and dragging it to position)
Troubleshooting:
If something goes wrong during upgrade or you are unsure how to proceed please take a look at our forum. Maybe someone already asked that question or an answer is provided.
If there is no thread regarding your question feel free to create one.

